Video Tutorial
Video Tutorial Transcription
Hey there, in this video we're going to talk about how to use relief maker reliefs inside of ZBrush. But the first thing that we should talk about is why would you ever want to do that? You can make reliefs in ZBrush already, and that's true. And I think an important thing to understand is the results that you're going to get.
So the first thing that we're going to do in this video is create a base relief from ZBrush. We have a 2048 by 2048 document size, so we're going to get a pretty high resolution relief. We've loaded our model and oriented how we want.
And so we're going to go to alpha, expand, base relief, and let's click make base relief. After a few seconds, our relief is created and it's over in our alpha. So now we'll go to lightbox.
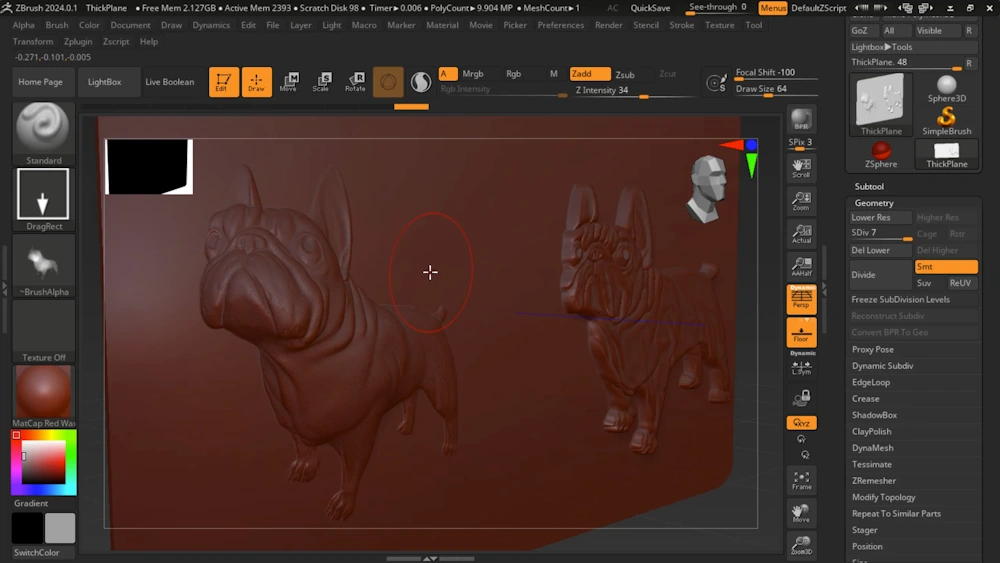
We're going to find a basic scene, maybe a plane. We're going to scale it down, change the material, turn off symmetry, and then we'll go down here to geometry and let's subdivide this. We'll go to seven.
And at this point we're ready to draw. So let's first choose the alpha and we'll choose the base relief that was just generated. And we may have to play with the height, but why don't we start at 30.
And the last thing is we want to make sure we use drag rectangle and let's start drawing. So there's our result and it looks pretty good. Now we want to see what the ReliefMaker version would look like.
So here we are in ReliefMaker. We've loaded up the same model. We've gotten roughly the same orientation or pretty close and we've set the size to 2048 by 2048 output.
Let's generate relief. We can take a look. We're going to go to file, export this and choose a PNG height map.
Let's call this dog and press okay. At this point we're done in ReliefMaker. It took just a few seconds.
And now let's jump back into ZBrush. Loading the thing that we just made in ReliefMaker is exceptionally easy. We just click the alpha channel and we're going to import the image.
We'll choose dog and we'll press open. So now we have the new dog from ReliefMaker is our alpha. And we may have to mess with the Z intensity because they're not always identical between the two products.
But why don't we just start with that? We could probably make it a little bit more prominent. So maybe why don't we choose an intensity of 35, 34. There we go.
So here we can do a really direct comparison between the types of results that you're going to get from ReliefMaker versus from natively within ZBrush. We can see the ReliefMaker version has a lot more depth to it and certainly from different angles. ZBrush reliefs tend to compress a lot of the detail in the very top section of the results.
Whereas the ReliefMaker outputs have equal amounts of detail in the entire Z height. And this matters because it means that at different angles, you can still get the correct effects that you want visually, which can matter a lot when you're making jewelry or anything like that, where you might be looking at things from a glancing angle. It also makes ReliefMaker outputs more suitable for things like mold cavity design, anything where you're going to be manufacturing something.
And aside from that, the basic capture of the depth is pretty superior in terms of the outputs that you're getting. So while this looks like a dog, this looks like a 3D dog. And you can be the judge for yourself, which one you think looks better.
There are certain cases where ZBrush's relief might be more suitable depending on what you're trying to accomplish. But for raw impressiveness, raw beauty, it's going to be ReliefMaker almost every time. So in this video, we've kind of shown not only how to make reliefs in ZBrush, but also how to make the same relief in ReliefMaker and how to bring it in and use it inside a ZBrush and also kind of compared and contrasted the results that you might expect.
We hope this has been helpful. We hope you think ReliefMaker would make an awesome addition to your ZBrush arsenal. And we cannot wait to see what you make.