Video Tutorial
Video Tutorial Transcription
In this tutorial, we're going to cover how you can use ReliefMaker outputs in your Blender projects. Here we are in ReliefMaker, and our objective is to get a relief of this dragon into Blender. The first thing that we'll do is orient the model in the correct orientation that we want for a project, and then we may want the output width and height to be a little bit ramped up, since this is for a CG application, and we'll just press Generate Relief.
We can see for our purposes that this is looking pretty good. We might want the height scale to be ramped up a little bit, although it won't really matter because we can change the results of this height map inside of Blender directly, but that's looking pretty good. So at this point, we have a few options.
We can export an OBJ and get that directly into Blender. Keep in mind when you're exporting OBJs of this size or 4k by 4k, you're going to have pretty big file sizes, so you need to be somewhat conservative on how you manage this. But another option that is perhaps more interesting is to use a height map, and so that's what we'll show today.
We're going to go to File, Export Relief, and we're going to choose a 16-bit height map. We'll call it Dragon. Now let's jump into Blender.
Okay, here we are in Blender, and just to start our scene, and you can incorporate this in all kinds of different ways, we're going to show for just a basic plane. We've gone into the plane, and we've subdivided it a fair amount, and you'll need to play with the amount of subdivision to get the results that you want, and we may have overdone it a little bit here, because there's other techniques like subdivision surfaces we can use later. But for now, we have a subdivided plane, and we're going to go to the Modifier tab and select Deform Displace, and we're going to add a new texture from that.
And it's kind of making things jump around for now, but that's okay. We're going to now need to define what the texture is, so let's go to the Textures tab. Make sure we have Texture02 selected or whatever the Displace modifier created.
We're going to open, and we'll select the Dragon output that we made earlier. The default settings here make this look very distorted, so we're going to go back to the Displacement Modifier settings and set the strength, and you're going to probably want to strength more in the 0.1, 0.2 range, something like that. You can play with it and kind of figure out what makes the most sense for your project, but in our case, maybe 0.15 is going to give us the results that we want.
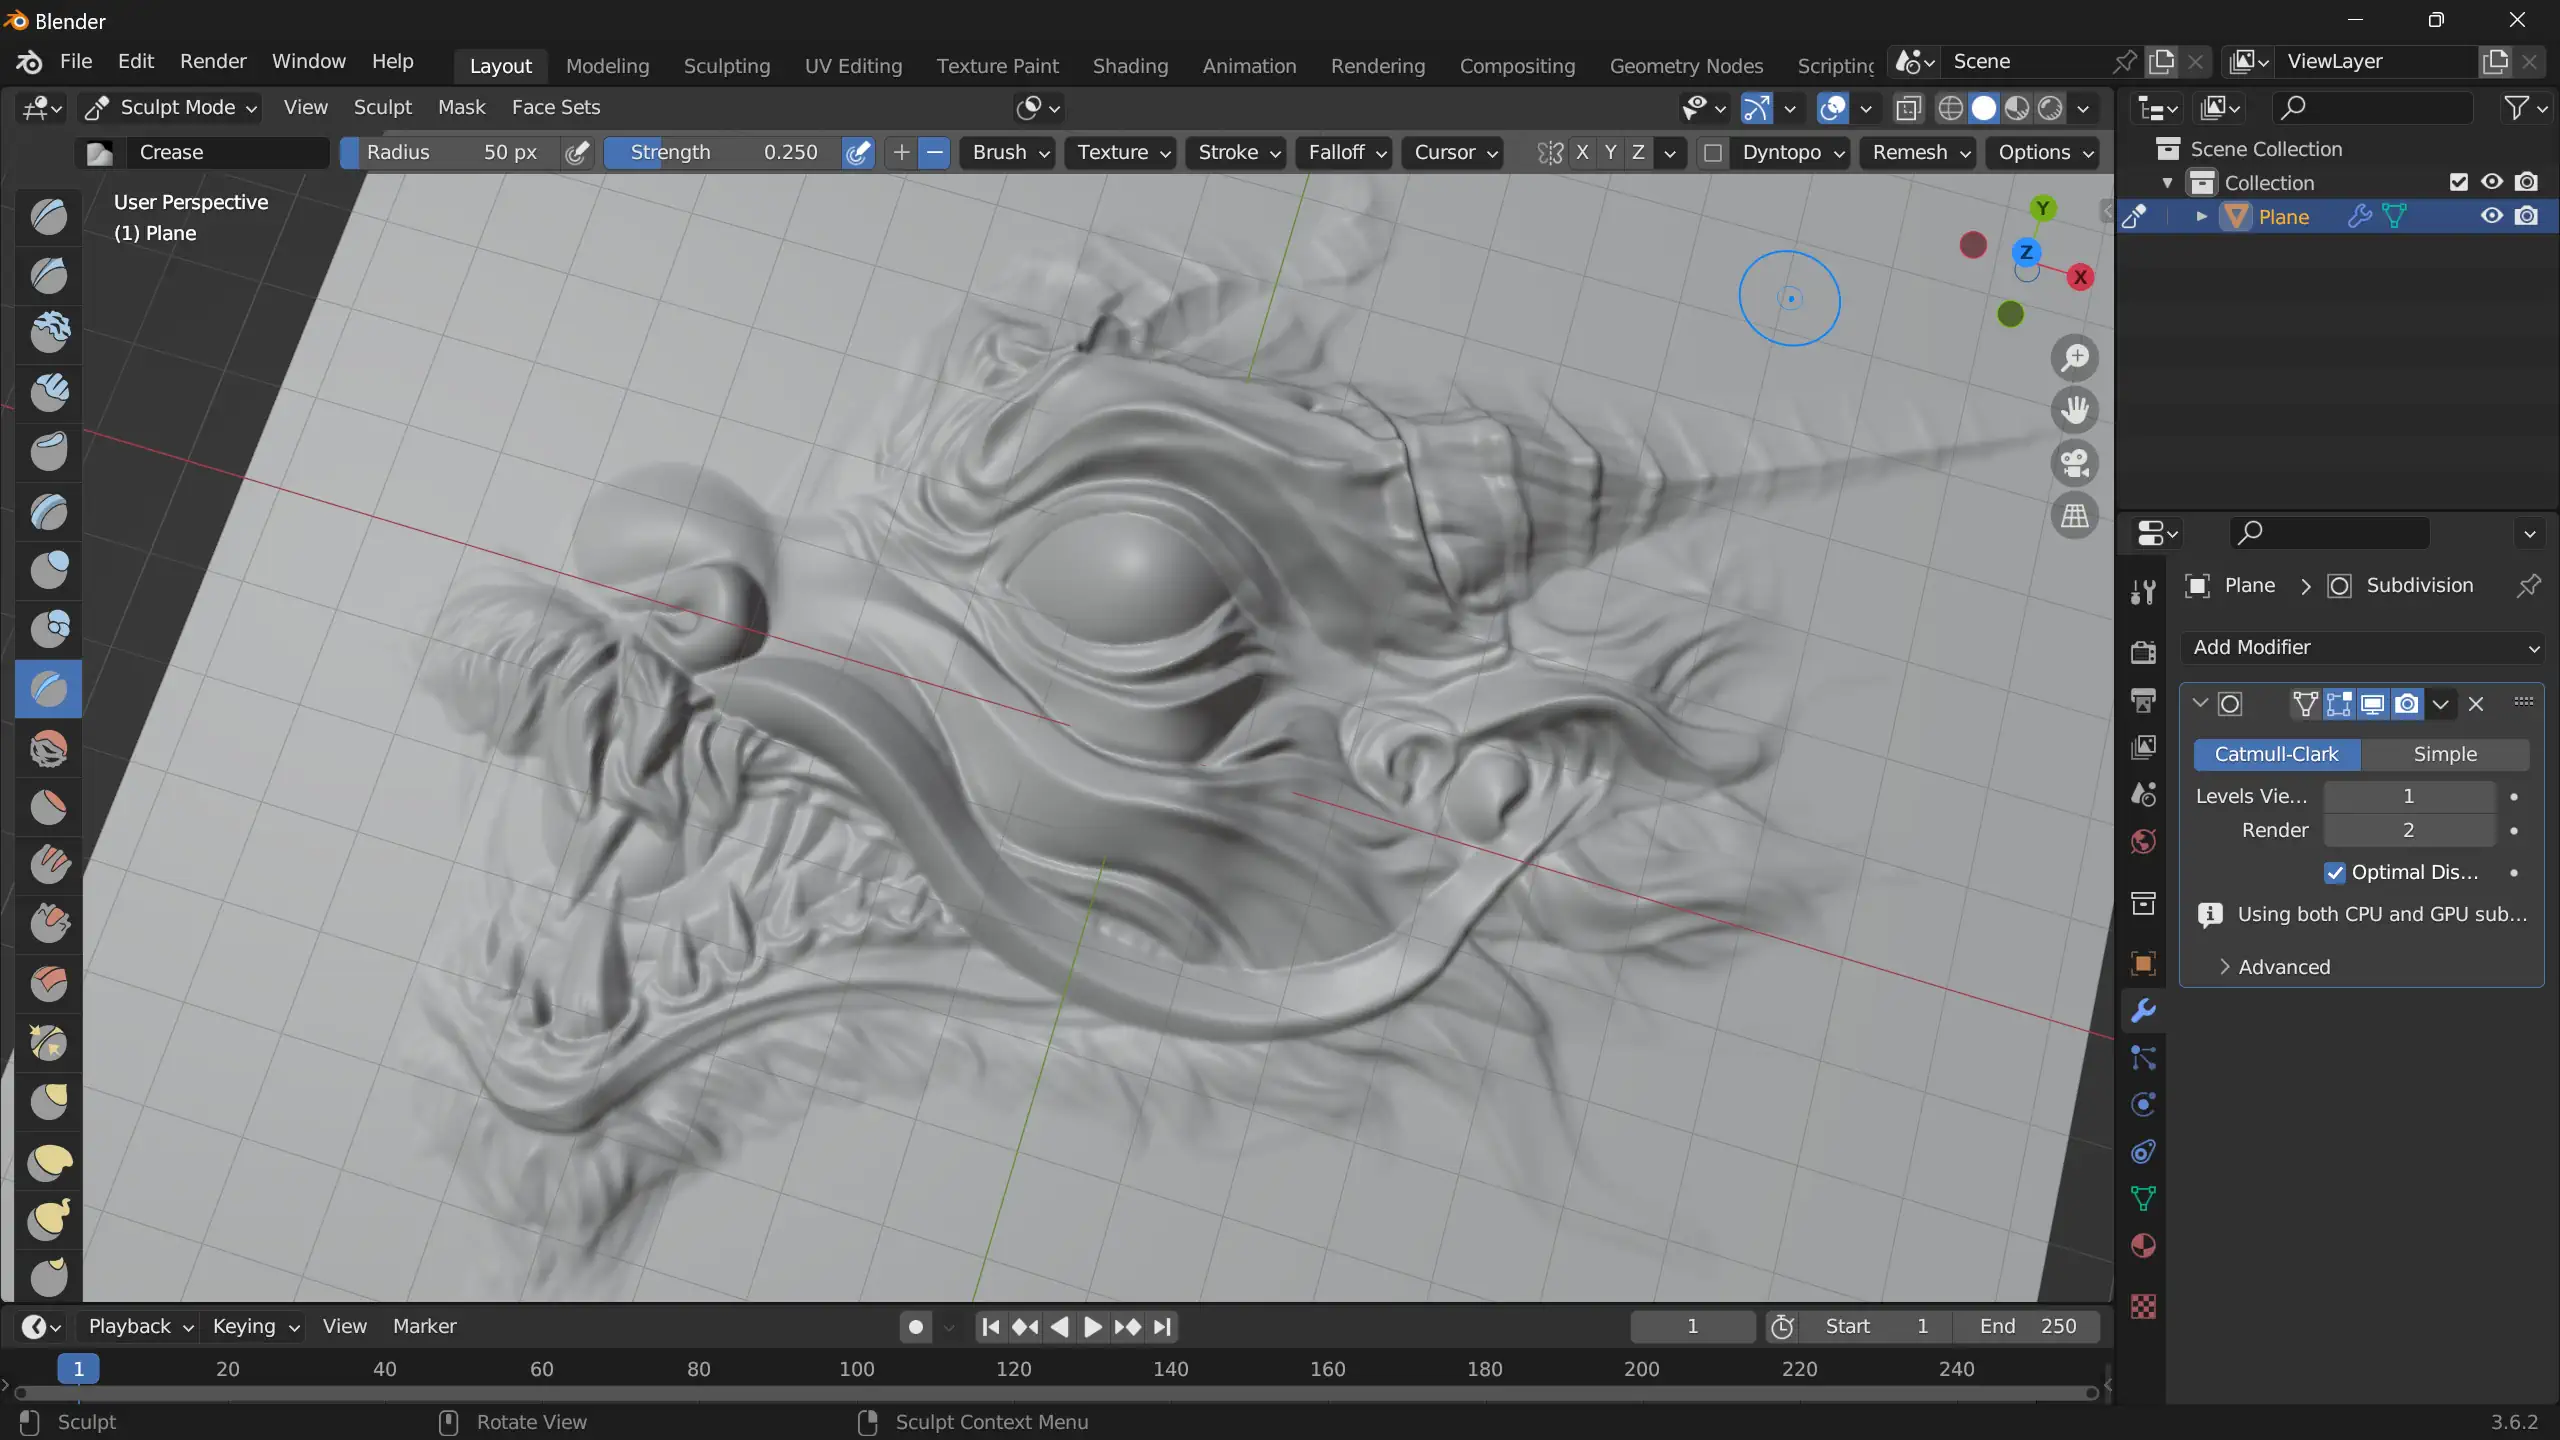
Now, you can do all kinds of interesting things at this point. Maybe we'll do 0.18. We could apply the Displacement Modifier if we wanted to do that, and we could perhaps add a SubD, make it look a little bit nicer, and of course, this is a real piece of geometry at this point. We've displaced the grid that we made earlier, and so now you can do all kinds of things.
You can go into Sculpt mode, and we could further refine some of this stuff if we wanted to add additional crease detail or any of the other kind of sculpting things that you could do in Blender. This is a really powerful toolset to do things that you might not have otherwise been able to do. If you're making a Colosseum, and this dragon's going to fight in the Colosseum, and you want to have stone representations of this dragon as if they were carved out and use real geometry for that, this is kind of a workflow that you could do to achieve something like that.
So, lots of possibilities here. Most people in Blender are used to using this workflow for things like terrain mapping, but this really extends the possibility and creative potential of what you can achieve. Anyway, we hope you enjoyed this tutorial.
It's pretty easy, and we cannot wait to see what you make.